SKINHELP SECTION - Quake1 - Rorshach Skin
Example2 Rorshach's NEW skin
Well out of all the Skin Artists I asked to do a guest feature noone has *really* gotten back to me, I expect they are all simply busy with own projects indeed i KNOW this to be so with a few of them. So to adress the problems of my Quakelord example skin and give u more tips here i present a 'Complete start to finish Skin Example' . The Skin I'm doing this time is one for myself as I havent done oen for myself since the QL skins and now that playing solo I feel terribly naked without a skin (dont feel right wearing the Qlror skin or anyone else's !).
Most that wrote to me about the QL skin example complained that whilst it was helpfull I still started from a previous base I'd made and thus gave myself more tools than you would be starting with. This time I am using the base.pcx as used by ID, I will also be allowed draw upon the base skins i give away free also tho my version's of them are more advanced, I will however restrict myself from usuing my bits of my other skins (annoying as that will be for me!).
The Concept
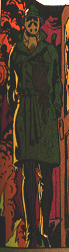
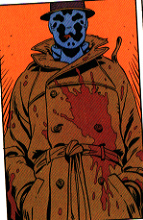
In case you have unfortunatly been missing out on one of the greatest stories ever written let me advise you to buy a copy of the Watchmen, it is a Graphic novel written by Alan Moore, and drawn by Dave Gibbons. I myself must have read this book over a 100 times, and it keeps getting better the more i mature. Anyway, there's a character called Rorschach in it on whom I based my own name.
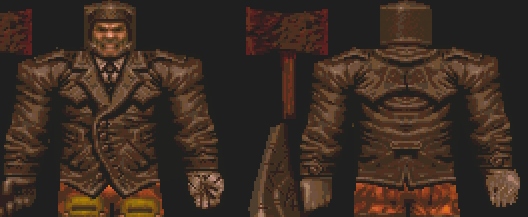
As you can see from these 2 pictures he wears a brown trenchcoat, dark purple pinstriped trousers, dark purple shoes / gloves ; his hat it also brown whilst his ever shifting mask is light creame as is his scarf.
Now the biggest problems I see in doing this skin is firstly the Mask, it is very intricate and due to it being light creame and dark brown it will be awkward to fit onto a tiny square block mdl, likewise with getting his funky hat on!
Another problem is going to be the Trenchcoat but i can work around this by having the coat flapping open on the legs. Other considerations are going to be the pinstripe and blood stains, this will mean working with different coloured versions of my skin.
So straight away I know this skin is going to take a lot of time and problem solving, but that just lets me show you more tricks and lets face it your not worried about how long it takes *me* are ya? :)
The Start
Knowing this skin is going to take me ages I decided to email The Dire Proto Fiend and ask his permission to galvanise his Qspy entry2's trenchcoat to save me time, most people dont bother asking as is plainly obvious but I was told I could use it after we find out the results of the competition it was entered in. The deadline has just been put back on this so I've procceded anyway, if its finished before the winners announced i will check with him again or just redo the coat.
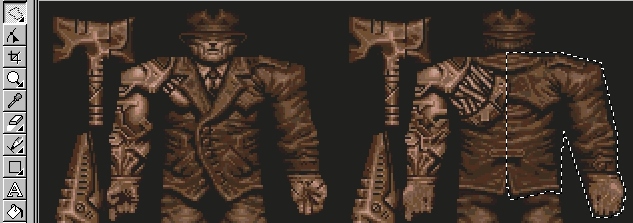
Now what you see here is a colourised version of the QSPY skin, I used the Light Brown palette in Corel Photopaint, you can get these palettes on the first page of this skinhelp section (also for Painshoppro).
I'm going to cut from the above onto the base skins as you yoursleves have in your Quakeworld QW directory, along with the quake palette.
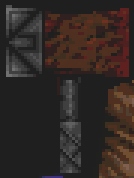
I'm using the mask tool to cut off the piece of DPF's I require , i.e one half of each side of the trenchcoat, the reason I take one side only will be obvious i trust, I'm not wanting metallic arms!
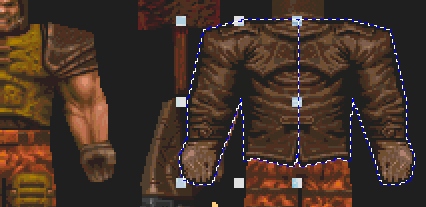
Now here you can see what happens if you try to mirror the one half of the skin to the other, it doesnt work. Although the mdl is almost identical on each side its not 100%, the left arms are more outstreched and longer than the right arm for a start, there are also other minor differences.
So once i have copied the front and back halfs I will have to do a little bit of creative cutting before altering it so it fits, it is best to do this by hand as using Object Rotate or SKEW, STRECH etc you will mess up the smooth tones and shades of colour, 90% of th time you are better off doing the grunt work yourself as it saves you plittering away trying to get the art program to do it for you.
After the grunt work the trenchcaot is starting to look a lot more like it should, the problem being here however that I will need to lengthen the Trenchcoat and add some spot effect, once again stretching will not help me.
For the moment I will leave the coat whilst I work on the trousers.
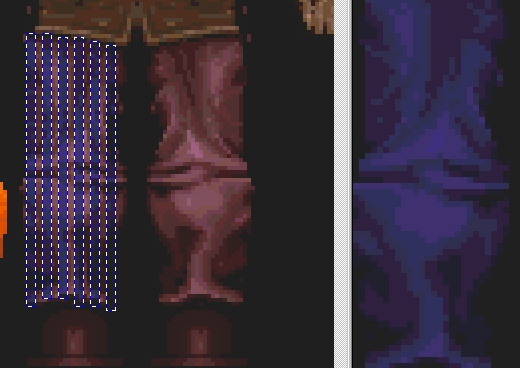
Black out one leg on each side of the skin, only one needs to be altered as u can safely mirror each leg unlike with the shoulder/arm areas which are slightly longer than the other.
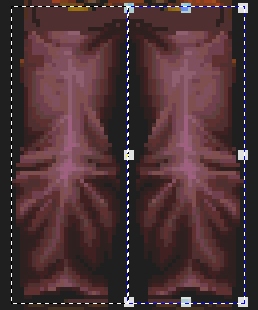
The image size on the right is generally the weakest zoom I will work on , I generally zoom up closer than this when much of th elayout has been done.
At the moment my concerns are that from the knee down the trousers will be darker and more tappered, also by making lots of stretch lines at the knees and groin area I will up a lot of otherwise blank areas with detail.
I am no working ALL the way up to the groin tho as I intend to make the Coat stretch over that area so drawing them in would be pointless.
BTW you should always be saving multiple versions of your skin at differnet stages of completion. Saves extra work
When both sides of the skins legs are complete I will make a duplicate of them and colorize them to the dark blue, then I will cut blue stripes onto the purple/ mauve coloured trousers which *should* complete the trousers look. Im also going to have to colourize the finished trenchoat so that I can make a red blood stain. So yes custom palettes are very handy and save a lot of time.
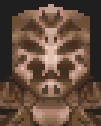
Moving on now to the face (even though I should just finish the legs!), I'm doing the face because I need to see how the skin is looking overall, simply having a skin witht he same clothes as Rorschach aint enough, I desperatly want to get the attitude into the mix. Attitude/ Mood is the central piece of my work, I hate seeing emotionless pictures, movies, skins, games ,stories etc there's so much dead art out there already so why add to it.
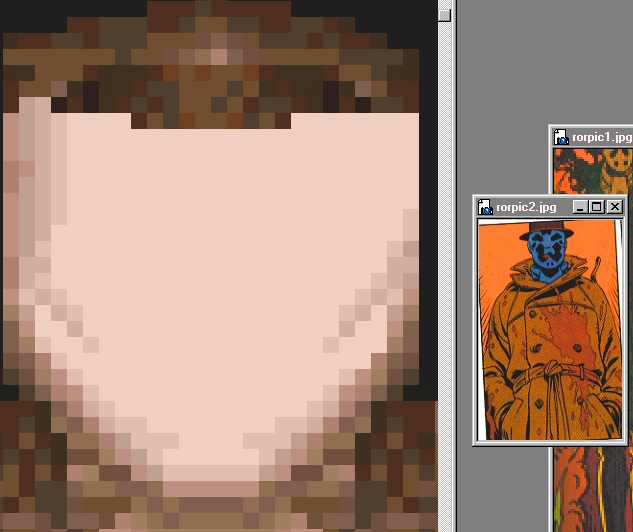
Woah big picture ALert! Always uses maximum zoom when doing the face of your skin as it will set the tone for the rest of your skin and thus a lot of time should be spent here, well moreso. Here I've got the 2 rorschach pics i scanned beside me for reference, thats relly for your benifit as I have the Watchmen beside me also but the point is clear. The task at hand is bringing comic art's sharp contrasting tones into quake's smoothly shaded contours. So the first thing I am doing is shading/smoothing the outside perimeter of the face from the light creame to the dark brown of the jacket. All of this has to be smooth but still the dark to light tones must get sharper near the edges to show shadow and also the shape of the face.

The right side of the face shows how lack of shading betwen contrasting tones can *hurt* the skin, it bascially looks like one of those doom2 pixel nightmares that occur when you get near objects. On the left side however I have modified the blots and also tried to lightly blend everything in together without losing the shape of the blot, no easy task is this, only accomplished by work. I had to go over redoing the face about 5 times but it WILL be worth it, just looking at the 2 sides of the face says it all.
After enough zooming in and out to make my head hurt I'm happy with the look of the face when zoomed out, well not so much happy as content to let it slide for the moment whilst i alter the length of the trenchcoat enough for me to get an accurate idea of how the skin is starting to look overall.
The Trenchcaot is now about the correct length but still look completly wrong in my mind, I can see me just making a new coat from scratch but again for the moment I wont get rid of anything that I dont have to.
Not sure about the hat, this is a constant problem in quake, there's only so much trick shading can do to hide the shape of a box head, so I decided at this point to see if I was getting anywhere near the mark and took a look at the skin IN quake.
In quake its clear that the hat is wrong, it looks like a bowler hat and whilst this would be cool if I was doing a Clockwork Orange skin its no good for this skins and will need changed.....
The Midway Rethink
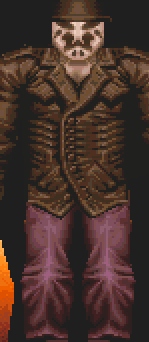
During the progress of making a skin you shoud always be revaluating its look in terms with the image in your mind, the image in front of you and also the constraints of the medium used. Here I've went and had a rethink about my skins head, theres only so much trickery can be done witha square block head and so i've decided to scrap the hat idea and modify the Rorschach character for my RorSHach skin :)
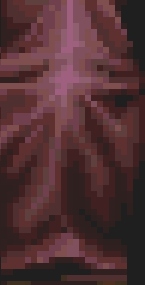
 As pictured to the left I've taken away the
hat and bgun working sorting out the troublesome chin also as its still looking
too big and streched ingame, in fact it could even been seen a loose cloth ingame
rather than a skintight ever shifting fabric :(
As pictured to the left I've taken away the
hat and bgun working sorting out the troublesome chin also as its still looking
too big and streched ingame, in fact it could even been seen a loose cloth ingame
rather than a skintight ever shifting fabric :(
It's still rough here but I decided to concentrate on bringing the whole skin up to speed first, next thing i start on is the shoes, which are easy to do really just a case of a half circle gradient of dark to light bordered with a left/right dark to middle light bar to show the sole of the shoes. Usually I just use the same front view of the shoes for the back but this time i narrowed the shading on the back to make it look more like a heel.
 Trousers are the next step, once i was happy
with the trousers i simply made a DUPLICATE image of the skin, converted to
RGB mode, desaturated all colour and finally converted the image to one of my
custom palettes, the dark blue one. Using this second image i cut and pasted
the corresponding areas of the dark blue trousers onto the mauve trousers version.
Trousers are the next step, once i was happy
with the trousers i simply made a DUPLICATE image of the skin, converted to
RGB mode, desaturated all colour and finally converted the image to one of my
custom palettes, the dark blue one. Using this second image i cut and pasted
the corresponding areas of the dark blue trousers onto the mauve trousers version.
As you can see to the right, it is a fiddly process but I spaced the 2pixel wide stripes 2pixels apart from each other so i couldnt really go wrong. As you should now be aware of once Ive done one side of either profile (front or back) I copy it and flip it horizontally onto the other side.
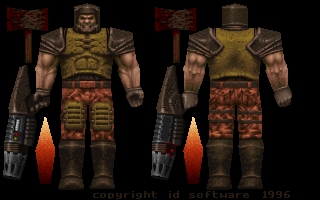
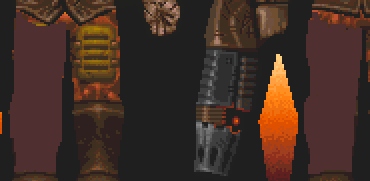
For a quick break from the Trousers I did some work on the axe, not a lot really but its worth mentioning that all the shading done on the axe, gun etc is streched a lot more noticeably in quake that say the arm or leg. So its worth while taking the time to put some sharp gradients of colour in rather than being light on the shading.
If you look at the bottom of the handle where there's some criss crossing bands, that for example will be streched so it looks 2 times as long ingame
As always when working on maximum zoomed views its worth while zooming out to defaulkt size to get an overall idea of how the skin looks.
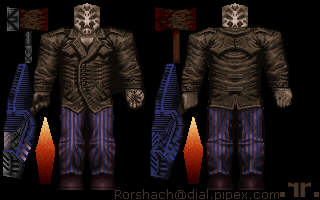 You can see that I've went back
on my word of not using my other skins as I've nicked part of the gun to use
as a base for a new gun. It will be changed a lot moer yet tho.
You can see that I've went back
on my word of not using my other skins as I've nicked part of the gun to use
as a base for a new gun. It will be changed a lot moer yet tho.
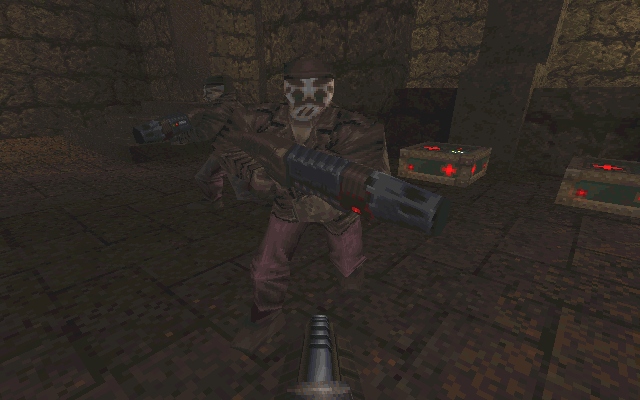
And yes for the moment I've simply taken the face and put it on the back of the head for sake of ingame testing like <G>
So far I'm still unhappy with it on the whole but its certainly pasable for rorshach now, tho the thing that sticks out most to me is that the colours are too bright for the image i want and also if it is to remain true to the original character it will have to be more grimy. This is easily accomplished in photopaint tho.
I can just convert the image to RGB and colorize and desaturate the colour strengths , then to ensure i dont get any spots that change colour with you shirt or unwanted fullbrite I convert to a custom palette that had top/bottom color and fullbrite edited out before switching to RGB then Quake palette again.
I expect that I'll do a lot of colour altering once all the detail has been done, aside with being unhappy witht eh current brightness of the colours i also intend on having stains ont he trousers and coat :)
more soon...
'Patience is a Virtue, and Artists are lazy people